There were countless nights when I lay awake staring at the ceiling, wondering if I was doing enough. Wondering if I was getting any of it right. But looking back now, 22 years later, I can trace every single beautiful, messy, heartbreaking moment of my life back to one choice I made on an ordinary October night.
The Night My Life Changed Forever
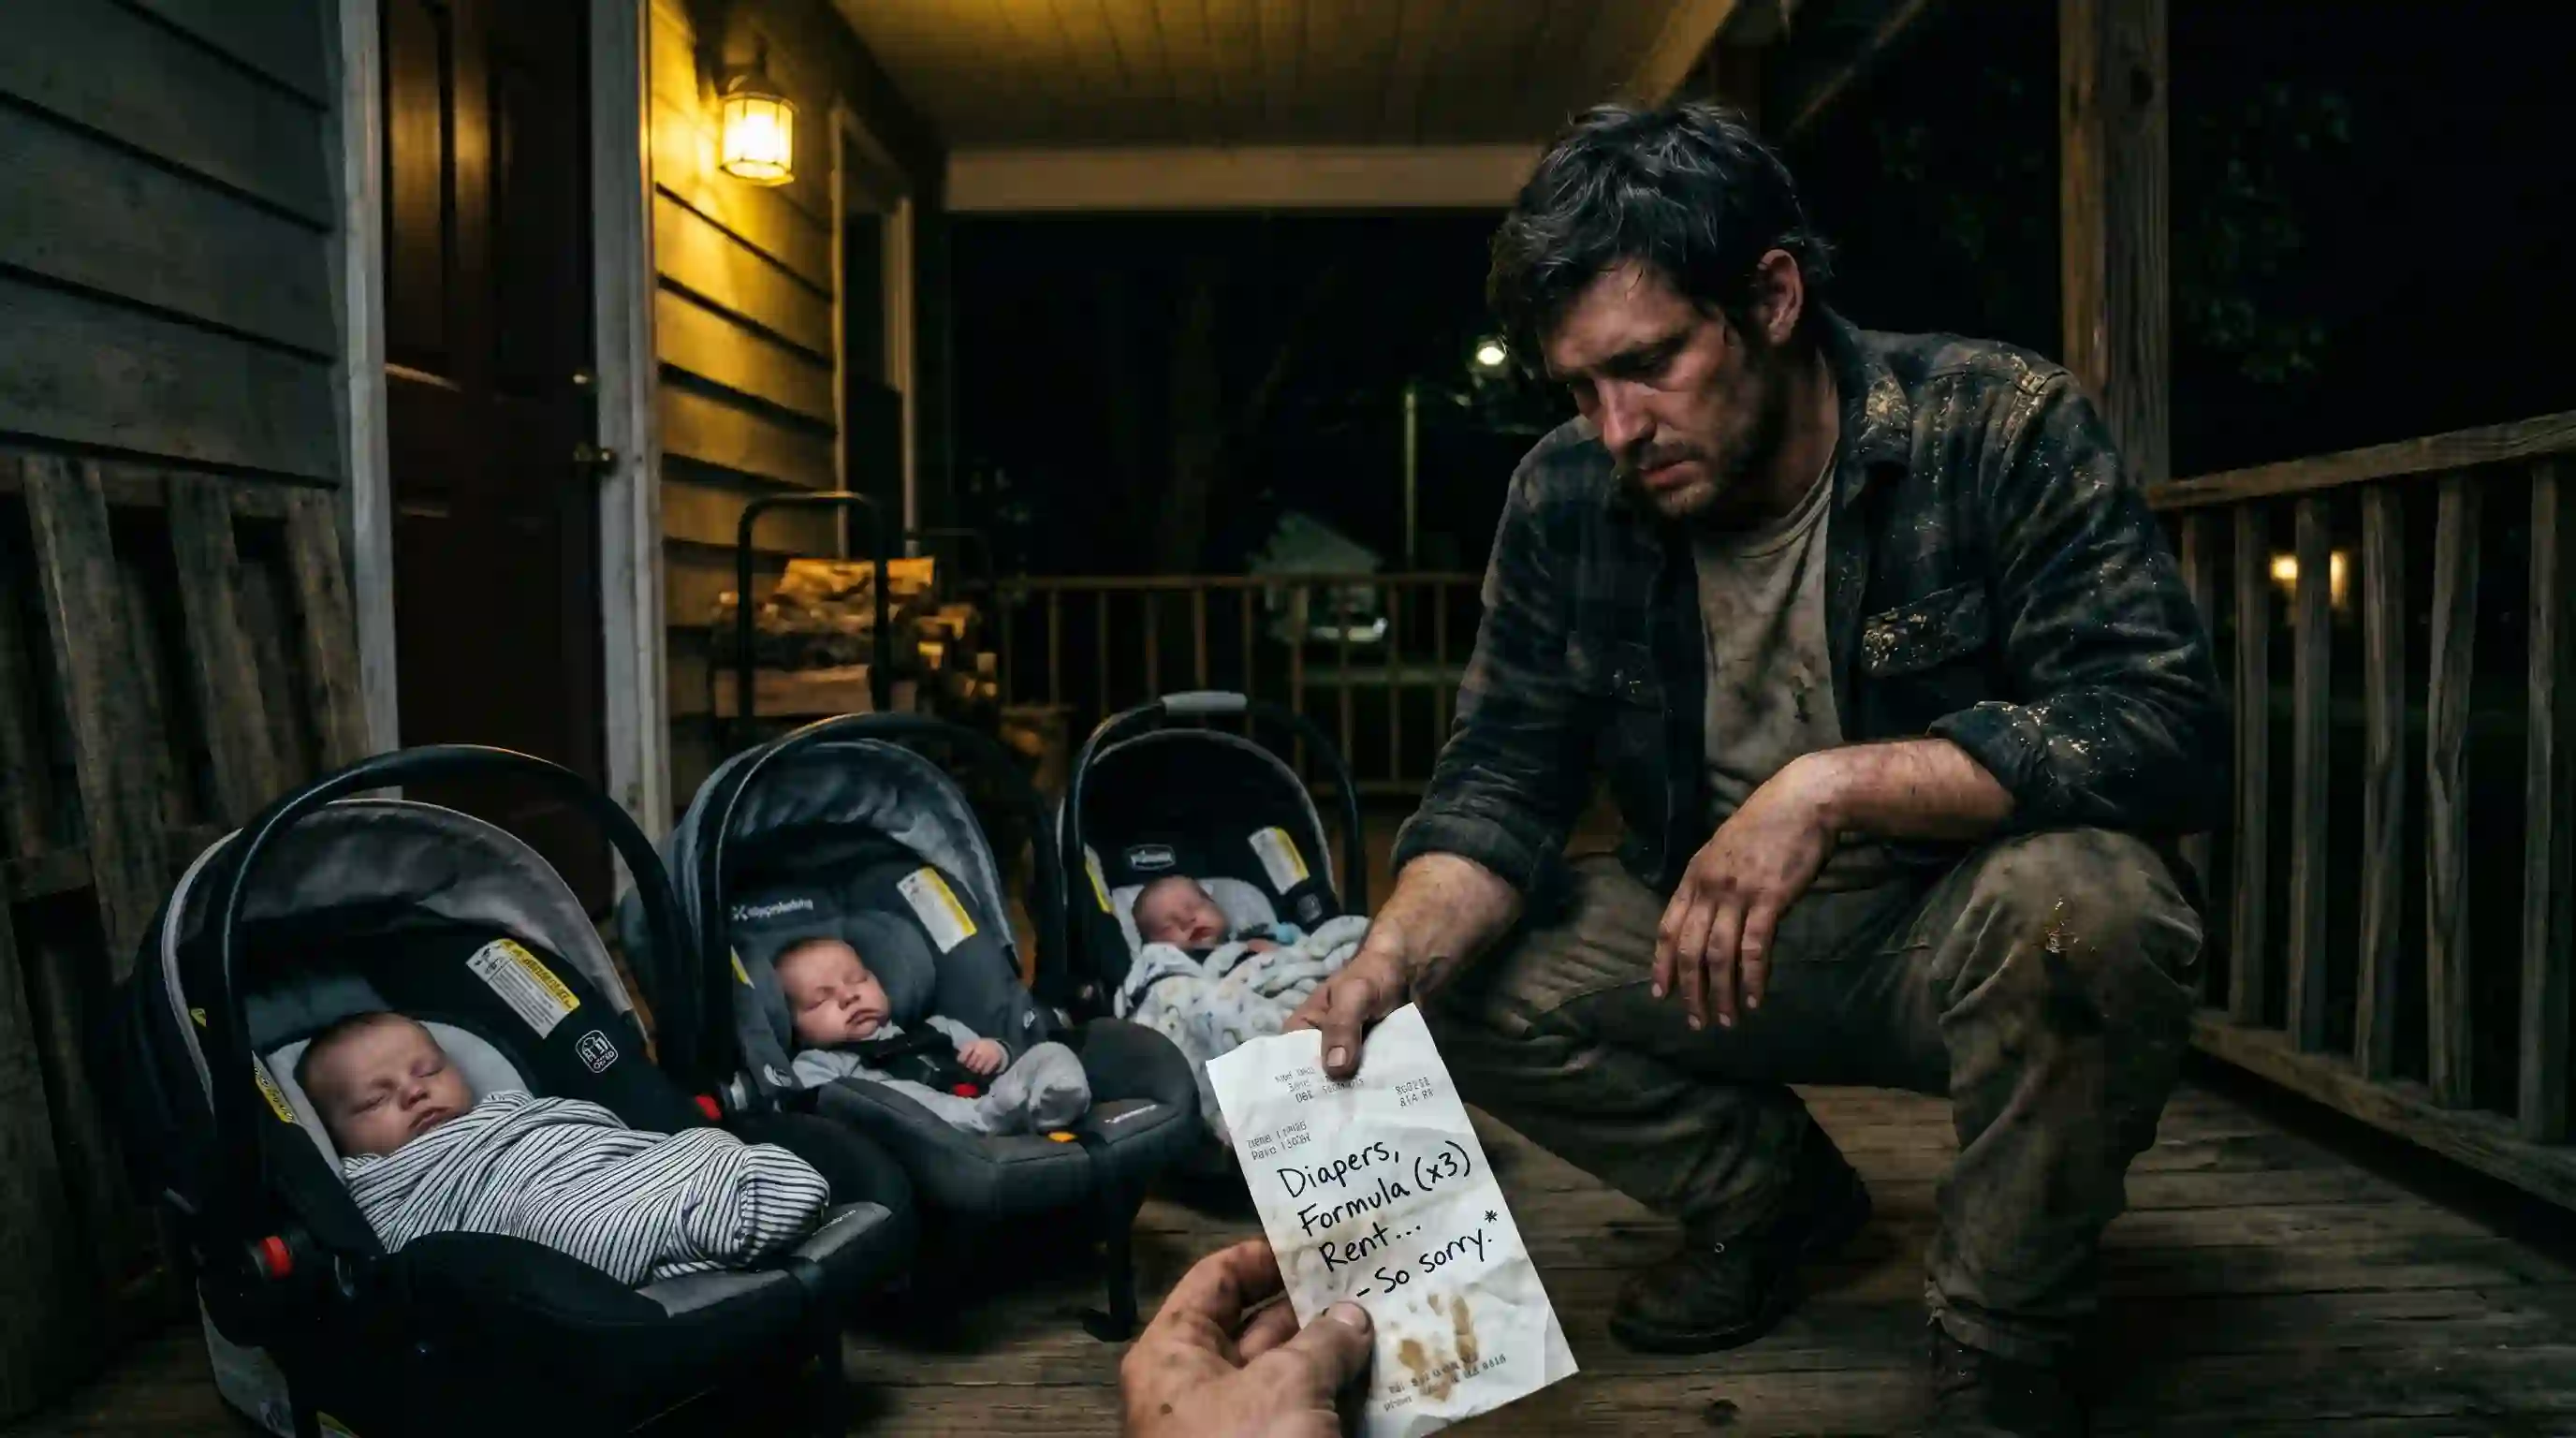
The porch light was flickering that October, throwing a narrow yellow circle across the wooden boards. I had just come home after a grueling double shift at the local hardware store. I smelled like sawdust and motor oil, my keys already in my hand, when I nearly stumbled over them.
Three car seats. One diaper bag. And a note scribbled on the back of a gas receipt.
I picked up the receipt first because my brain simply refused to process what was sitting inside those car seats. The handwriting belonged to my brother, Daniel. It leaned sharply to the right, just like it always had.
“I’m sorry, Noah. I can’t do this.”
That was it. No phone number. No forwarding address. Daniel’s wife, Patricia, had tragically passed away just 11 days earlier. My brother had made it less than two weeks as a single father before walking away.
I was 27 years old, entirely single, and living in a tiny apartment above the hardware store where I swept floors. I had exactly $312 to my name and a broken futon.
In an instant, my life as a carefree 27-year-old was over.
One of the triplets let out a tiny, damp hiccup. I crouched down. Two small faces were fast asleep, but the tiniest one was wide awake, watching me with eyes the exact same shade of gray as my late mother’s.
Just then, my nosy-but-kind neighbor, Mrs. Hunter, stepped out. She took one look at the babies, read the note, and gasped. “Honey, you can’t raise three babies alone! You don’t even know how to warm a bottle.”
I was about to agree with her. I was about to let her call social services. But then, the smallest baby reached out blindly and wrapped her tiny fist around my index finger. It was impossibly strong.
“That’s June,” Mrs. Hunter whispered.
Baby June just kept gripping my finger. She didn’t know I was broke. She didn’t know her father had abandoned them. She only knew someone was there. I swallowed hard and whispered, “Okay. I’ve got you.”
Becoming “Dad” By Accident
I carried them inside one by one. Somewhere between the second trip and the third, I stopped being Uncle Noah and became something I didn’t yet have a name for.
The next 22 years passed the way a long workday does: excruciatingly slow while you’re inside it, but gone in a flash when you look back. I worked double shifts. Then triple shifts whenever one of the girls needed braces, a science fair board, or new shoes.
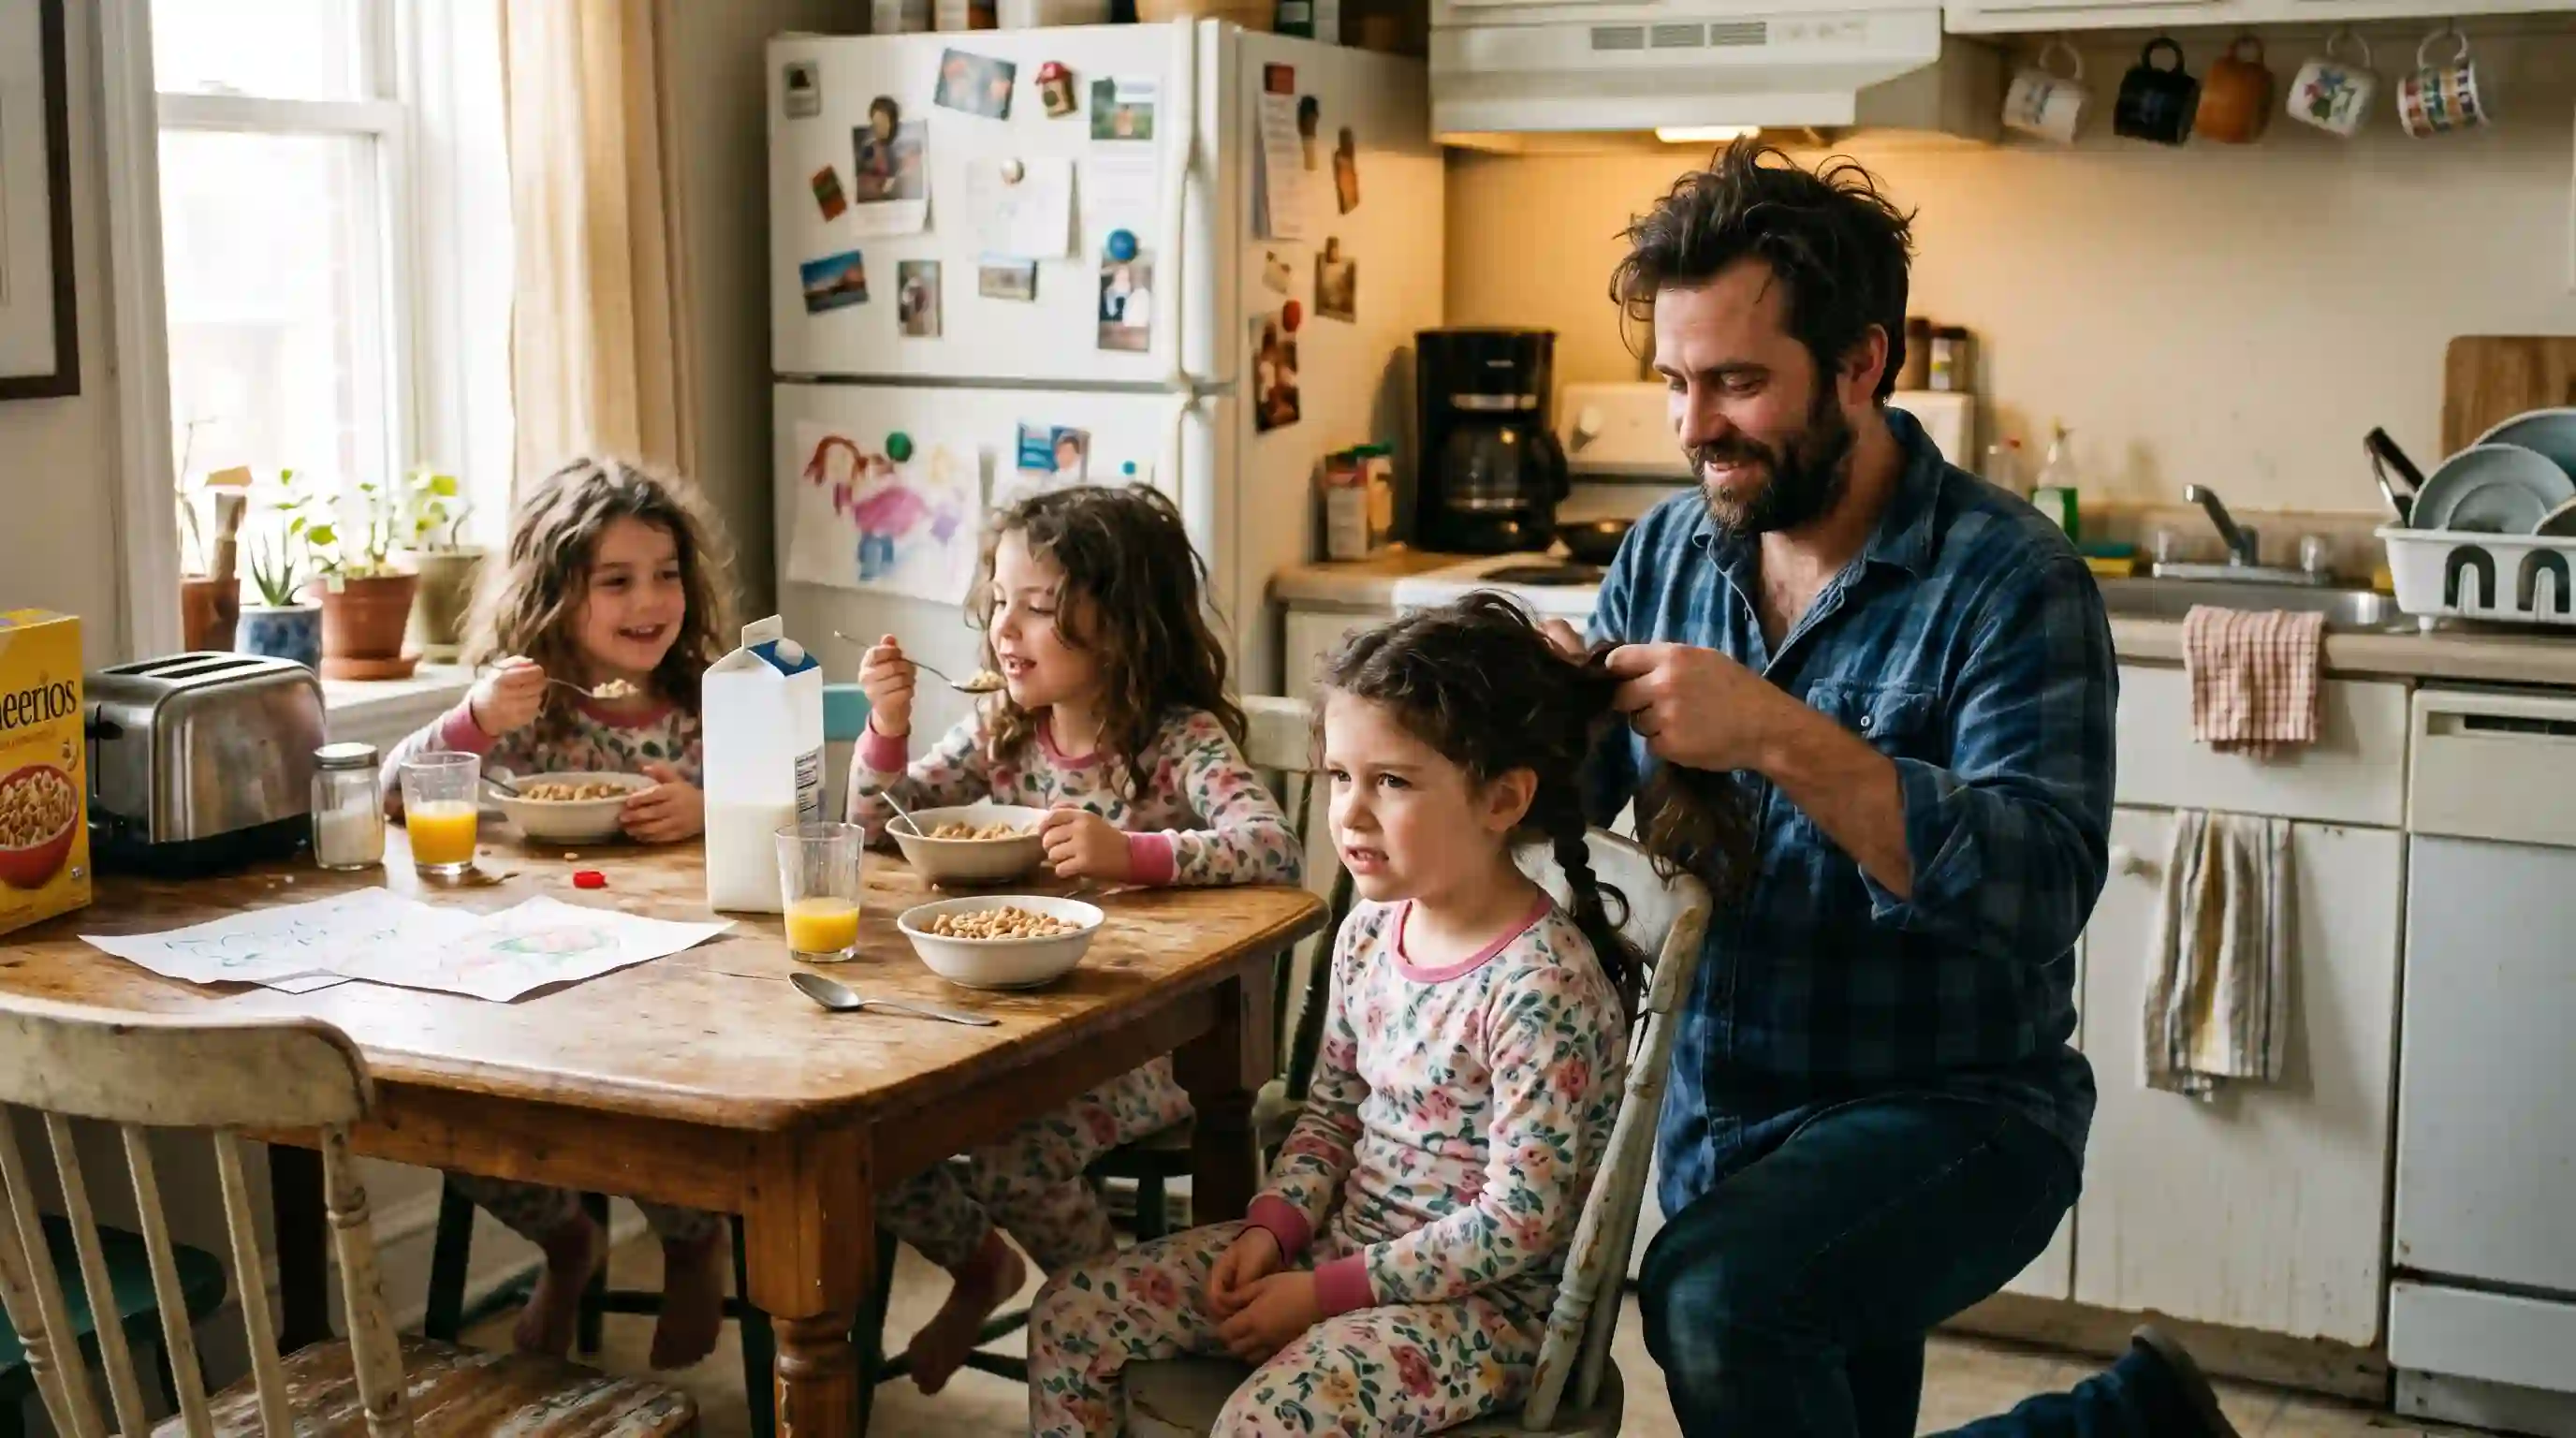
I braided hair terribly, packed the wrong lunches, but I always showed up.
I sacrificed a lot. I missed fishing trips. I missed cousin’s weddings. I missed the chance to build a traditional family.
I also lost Diana, the woman I loved. She waited for me for a long time, but one night she asked if there was room in my life for her. I looked at my chaotic, exhausted reality and told her, “There isn’t. Not the kind you deserve.” She left her sweater behind, and I never gave it back.
Through the teenage angst, the slammed doors, and the heartbreaks, I stayed. But beneath it all, I harbored a deep, dark fear: Were they still waiting for their “real” father? Was I just the guy who stayed, rather than the dad they truly wanted?
The Graduation Day I Dreaded
On the morning of the triplets’ college graduation, I sat in my truck for 20 full minutes, paralyzed by anxiety. I was 49 now. My beard was gray, and my knees ached.
In my wallet, tucked behind a food receipt, I still carried Daniel’s original note from that October night. I unfolded it, wondering if the girls would bring him up today. Wondering if they wished he was the one sitting in the audience.
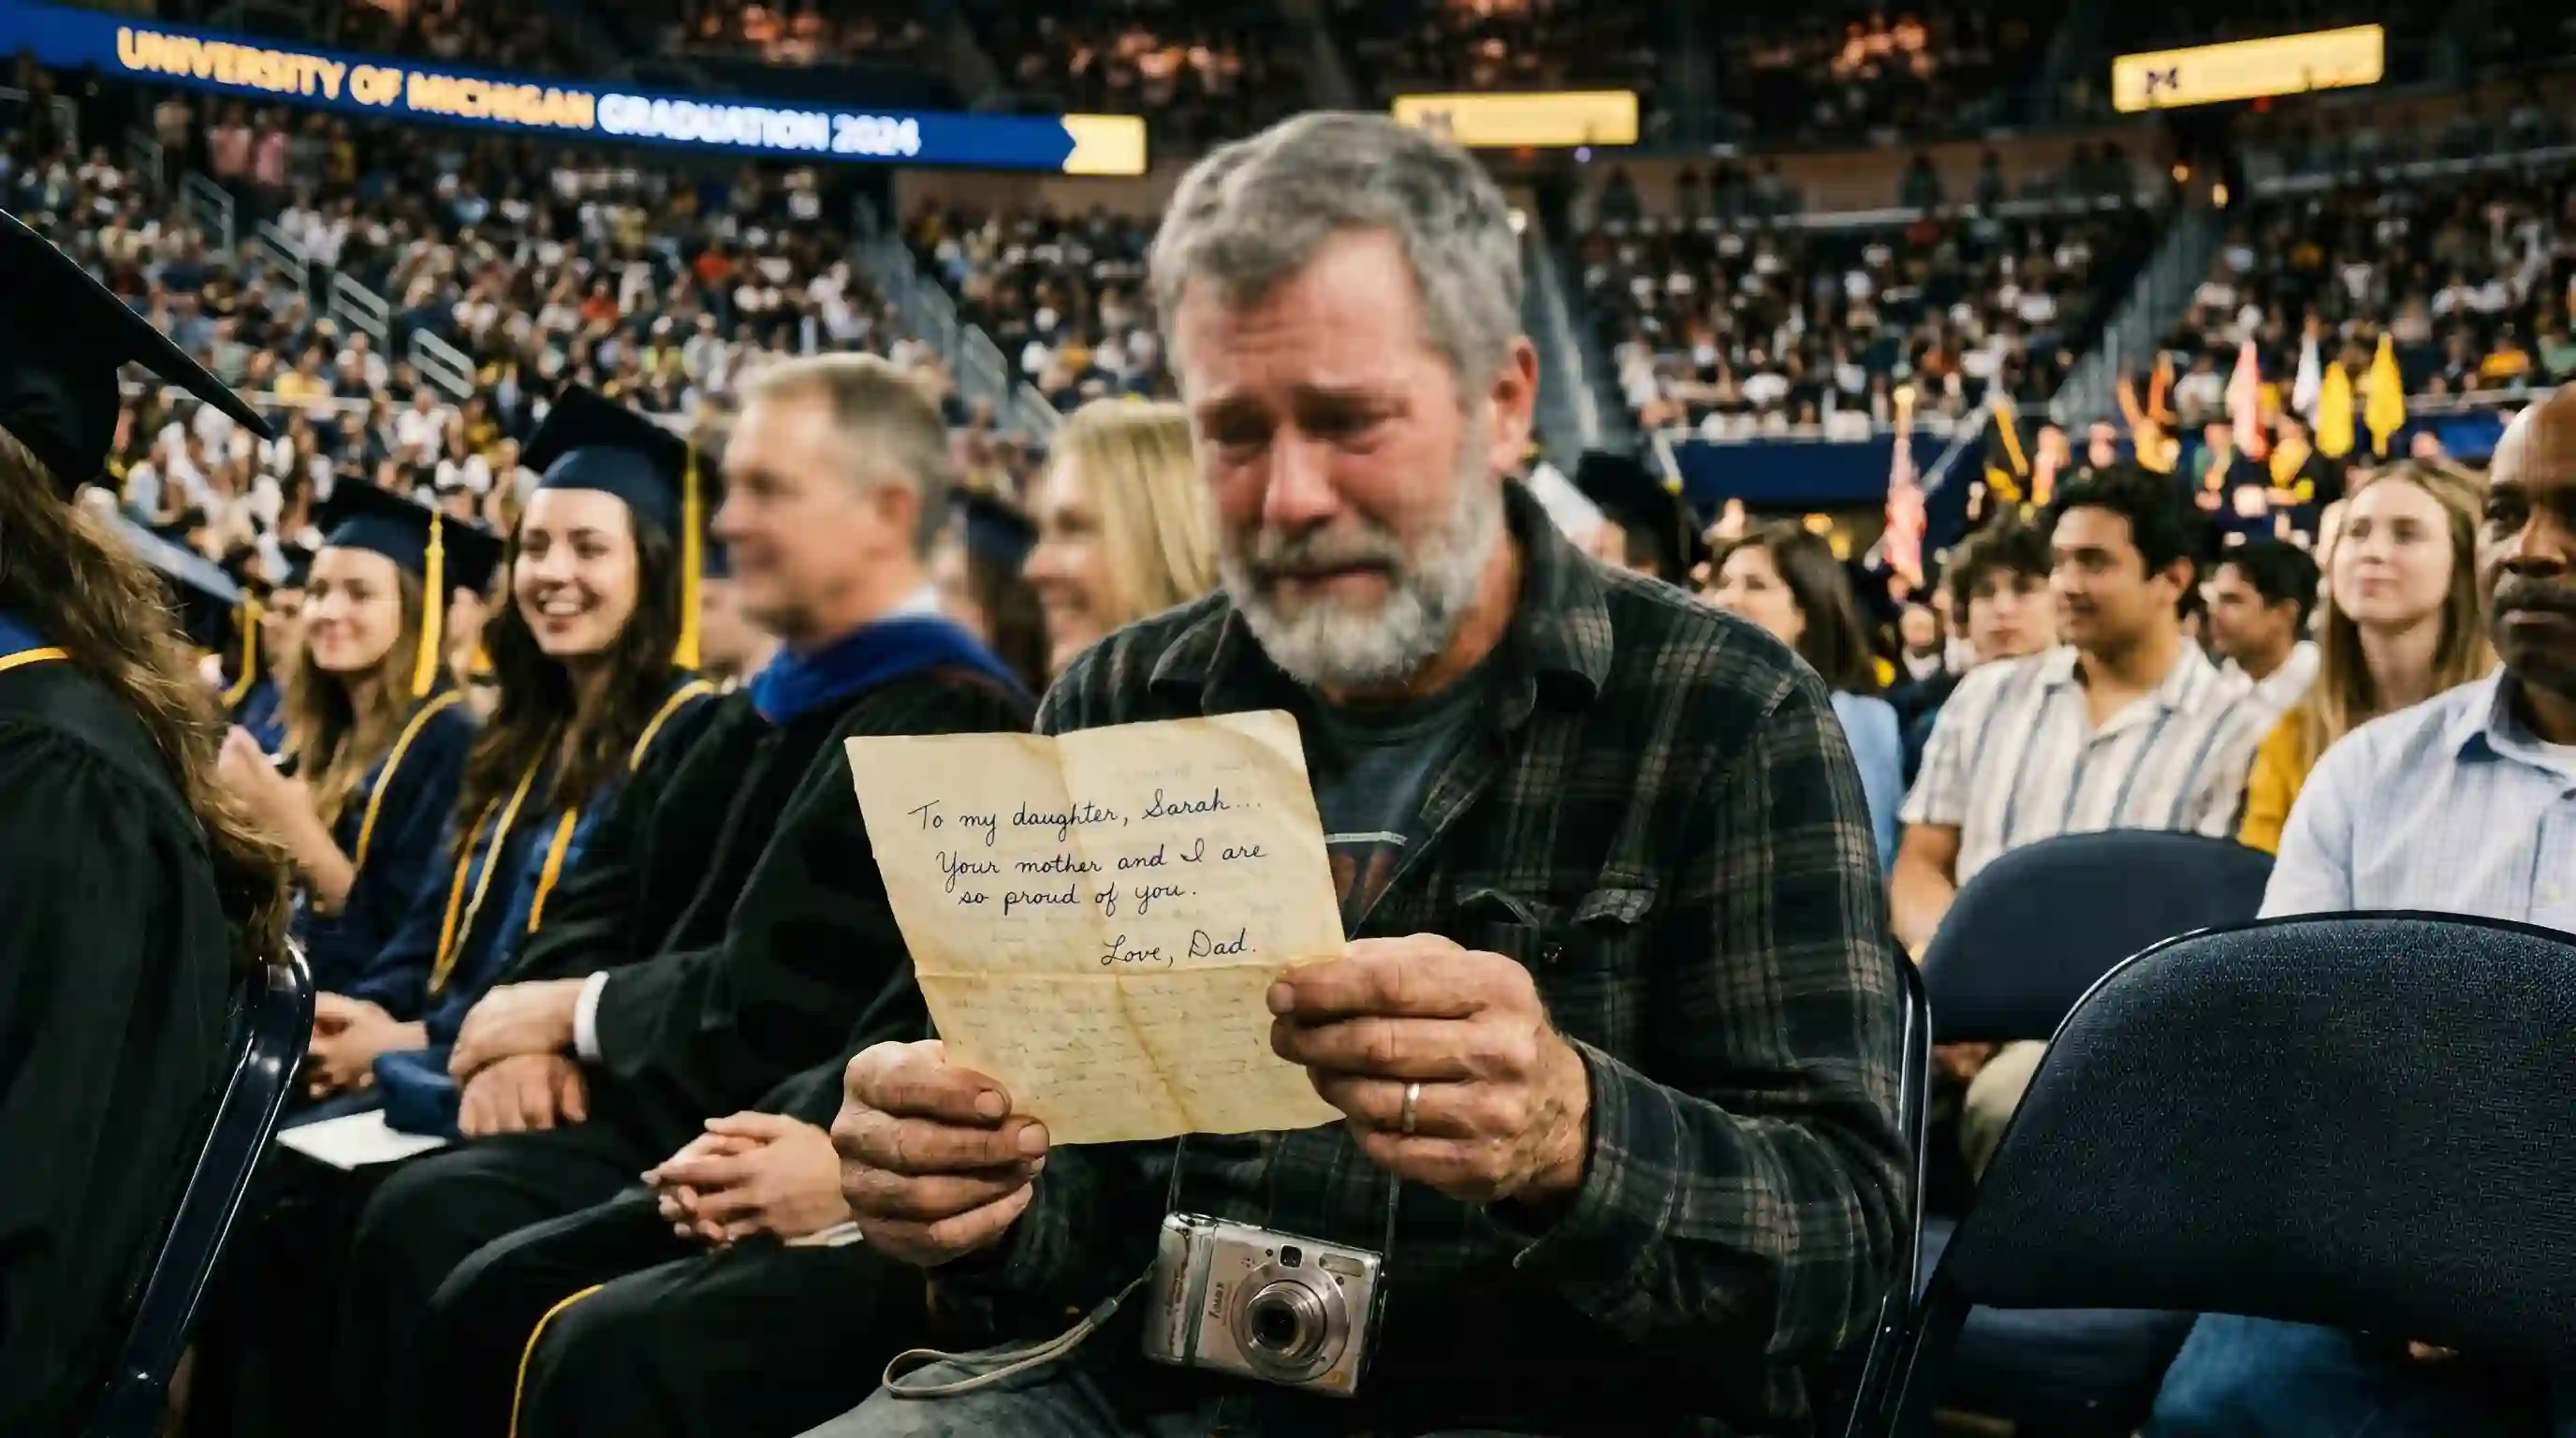
Twenty-two years of waiting for this day, and I was terrified they wished someone else was in my seat.
I sat seven rows back in the auditorium. Ava crossed the stage first, crying. Claire waved at me wildly, just like she did from the school bus when she was eight. Finally, June crossed. She looked serious, carrying something heavier than a diploma.
After the ceremony ended, the dean tapped the microphone. My three girls walked back onto the stage together, holding hands.
June took the microphone. “Our father couldn’t be here today,” she announced to the silent room.
My stomach plummeted. Daniel. They were going to honor the man who abandoned them. The hurt rose in my throat, but I told myself to smile. To let them have this.
The Notebook That Changed Everything
“We found a notebook,” June said, her voice shaking. “The one in the kitchen drawer.”
I froze. I gripped my cheap camera so hard the plastic creaked. I thought of the late nights at that warped kitchen table, writing to three sleeping babies because I couldn’t afford birthday presents.
June opened the notebook and began to read: “To my girls. You’re one year old today. I don’t know if you’ll ever read this… I’m 27. I’m scared all the time. I don’t know how to be a father, but I know I’m not going anywhere.”
A chill ran straight down my spine. I knew those words. Because I wrote them.
When she said “Our father,” she meant ME.

There wasn’t a dry eye in the auditorium as they read the words I wrote 21 years ago.
My knees literally hit the floor. The man next to me had to help me back into my seat. Ava took over reading, her voice breaking: “I promise you breakfast every morning, even if it’s burnt. I promise you’ll never wonder where I am.”
Then June walked down the stage steps and came straight to row seven. She knelt beside me and placed a framed legal document in my shaking hands.
“We filed the petitions months ago,” June whispered through her tears. “They went through last week.”
Ava spoke into the microphone for the whole room to hear. “We found what our biological father left behind. But you were never our uncle. You were always our dad.”
The entire auditorium erupted, rising to their feet as my three beautiful daughters wrapped me in the biggest hug of my life.
Making Room For the Future
Three weeks later, I was back in my apartment above the hardware store. I hung two frames on the wall. On the left: the gas receipt note from my brother. On the right: my official adoption papers.
For twenty years, I had called this life a sacrifice. But standing there, looking at those frames, I finally understood it wasn’t. It was the life I had chosen. And miraculously, it had chosen me back.
I sat down on my couch, pulled out my phone, and scrolled to a number I hadn’t dared to call in 12 long years.
Diana.
I pressed call before I could talk myself out of it. And on the second ring… she answered.
Note:This work is inspired by real events and people, but it has been fictionalized for creative purposes. Names, characters, and details have been changed to protect privacy and enhance the narrative. Any resemblance to actual persons, living or dead, or actual events is purely coincidental and not intended by the author.
All images used in this article are AI-generated and intended for illustrative purposes only.